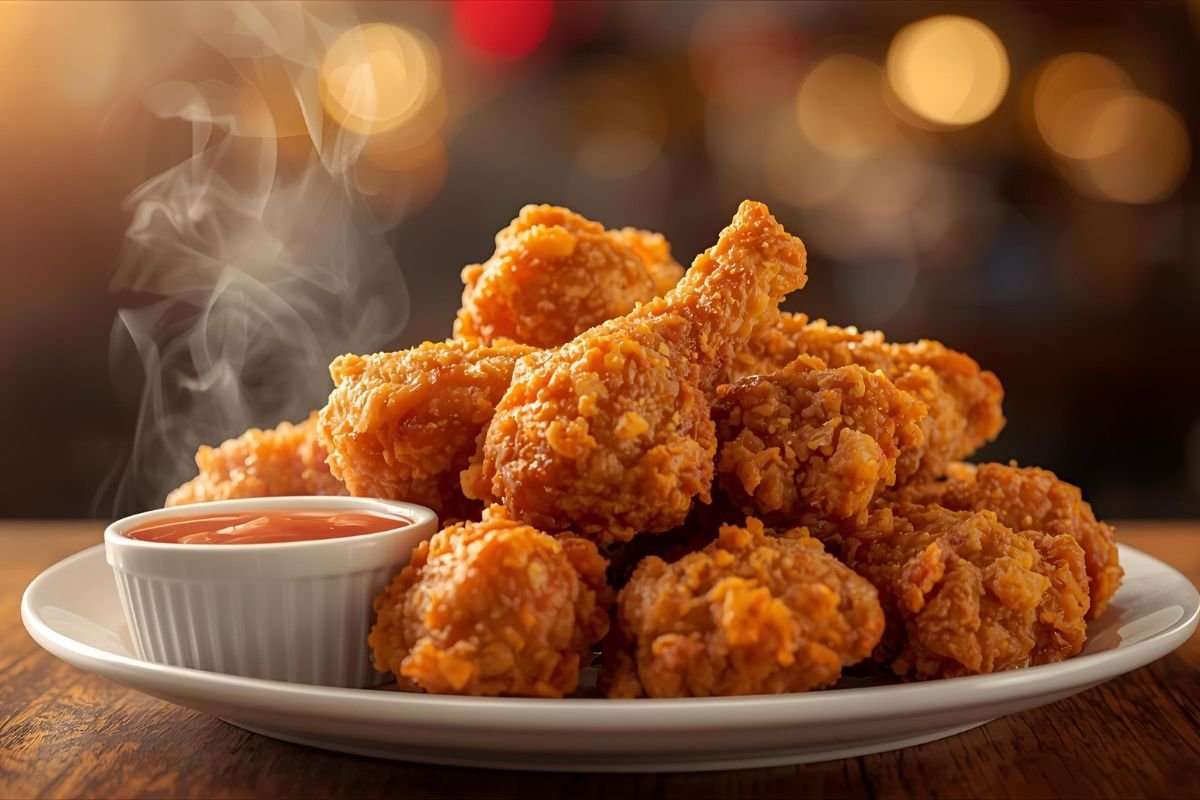
There’s something universally irresistible about crispy fried chicken—the golden-brown exterior that shatters with each bite, revealing tender, juicy meat inside. Whether you’re preparing a Sunday family dinner or craving comfort food, mastering the art of perfect fried chicken transforms an ordinary meal into an extraordinary experience. However, achieving that restaurant-quality crunch at home often feels elusive. Too often, home cooks end up with soggy coating, unevenly cooked pieces, or chicken that lacks that signature crackle.
The journey to crispy chicken perfection isn’t about luck—it’s about understanding the science and technique behind this beloved dish. From professional kitchens to grandma’s secret recipe, certain fundamental principles separate exceptional fried chicken from mediocre attempts. The difference lies in preparation methods, ingredient choices, temperature control, and timing that work together harmoniously.
In this comprehensive guide, we’ll unveil 10 game-changing secrets that professional chefs and experienced home cooks use to create perfectly crispy fried chicken every single time. These techniques have been tested, refined, and proven to deliver consistent results. Whether you’re a beginner learning to fry chicken for the first time or an experienced cook looking to elevate your skills, these insider tips will revolutionize your chicken frying technique and guarantee that coveted golden, crunchy exterior paired with succulent interior.
1. The Brine Makes All the Difference
Why Brining Is Essential for Juicy Chicken
The foundation of exceptional crispy fried chicken begins hours before the oil hits the pan. Brining chicken involves soaking the meat in a saltwater solution, which fundamentally changes its texture and flavor profile. This process allows the chicken to absorb moisture and seasoning deep into the fibers, ensuring every bite is flavorful and juicy.
A proper brine typically contains 1/4 cup of salt per quart of water, along with optional additions like sugar, herbs, garlic, and peppercorns. The salt breaks down protein structures, allowing the meat to retain more moisture during the intense heat of frying. For optimal results, brine your chicken for 4-12 hours in the refrigerator. This simple step prevents the dreaded dry chicken interior that many home cooks struggle with, creating a perfect contrast with the crunchy coating.
Buttermilk: The Southern Secret
Alternatively, many Southern fried chicken recipes swear by buttermilk marinade instead of traditional brine. The acidity in buttermilk tenderizes the meat while adding a subtle tangy flavor that complements the savory coating. Soak your chicken pieces in buttermilk overnight for maximum tenderness. Some cooks add hot sauce, garlic powder, or paprika to the buttermilk for extra flavor dimension.
2. Temperature Control Is Non-Negotiable
The Magic Number: 350-375°F
Temperature control separates amateur fried chicken from professional-grade results. The ideal frying temperature ranges between 350°F and 375°F. At this temperature range, the coating crisps up quickly while the interior cooks through without burning the exterior.
Invest in a reliable cooking thermometer—this isn’t optional. Too low, and your chicken coating absorbs excess oil, becoming greasy and soggy. Too high, and the outside burns before the inside reaches a safe 165°F internal temperature. When you add chicken to the oil, the temperature drops naturally. Add only 3-4 pieces at a time to maintain consistent heat, allowing the oil to recover between batches.
Oil Selection Matters
Choose oils with high smoke points for frying chicken at home. Peanut oil, vegetable oil, and canola oil all work excellently. Peanut oil is preferred by many professionals for its neutral flavor and 450°F smoke point. Whatever you choose, use enough oil so chicken pieces can float freely—typically 2-3 inches deep in your pot or skillet.
3. Double Dredging Creates Ultimate Crunch
The Two-Step Coating Process
Professional chefs know that crispy fried chicken coating requires a double dredging technique. First, coat your marinated chicken in seasoned flour, then dip back into buttermilk or egg wash, and finally coat in flour again. This creates multiple layers that develop into that extra-thick, ultra-crunchy crust everyone craves.
The first flour layer adheres to the wet chicken surface, the second liquid layer creates adhesive for the final coating, and the last flour layer builds substantial texture. Many recipes add cornstarch or baking powder to the flour mixture—cornstarch adds extra crispiness, while baking powder creates tiny air pockets that puff up during frying, enhancing crunch.
Let It Rest Before Frying
After the final dredging, let your coated chicken rest on a wire rack for 15-30 minutes. This resting period allows the coating to set and adhere properly, preventing it from falling off during frying. It also brings the chicken closer to room temperature, promoting even cooking throughout.
4. Season Aggressively at Every Stage
Layer Your Flavors
The secret to flavorful fried chicken isn’t just about the coating—it’s about building flavor at every stage. Season your brine or buttermilk marinade generously. Then, season your flour mixture heavily with salt, black pepper, paprika, garlic powder, onion powder, and cayenne pepper.
Many home cooks under-season their flour mixture, resulting in bland coating despite well-marinated meat. A good rule of thumb: your seasoned flour should taste slightly over-seasoned on its own, as much of the flavor mellows during frying. Don’t forget to season the chicken immediately after frying with a light sprinkle of salt while it’s still hot—this final touch enhances the overall flavor profile dramatically.
5. Choose the Right Chicken Pieces
Understanding Cooking Times
Different chicken pieces require different frying times, which affects your crispy chicken recipe success. Bone-in, skin-on pieces deliver the best flavor and texture. Breasts take 12-15 minutes, thighs and legs need 10-14 minutes, and wings require 8-10 minutes.
For even cooking, consider frying similar-sized pieces together. Start with white meat and move to dark meat, as dark meat can tolerate slightly longer cooking without drying out. Using a meat thermometer ensures food safety—chicken must reach 165°F internally. However, many chefs prefer 170-175°F for dark meat, which breaks down connective tissue for ultimate tenderness.
6. Master the Art of Oil Management
Maintain Clean Oil for Best Results
Fresh, clean oil produces the most golden crispy chicken. As you fry multiple batches, flour particles accumulate and burn, darkening the oil and imparting bitter flavors. Skim debris between batches using a fine-mesh strainer or spider skimmer.
Monitor your oil’s condition throughout the cooking process. If it darkens significantly, develops excessive smoke, or smells burnt, it’s time to strain and possibly replace it. Quality oil management ensures every piece emerges with a beautiful golden-brown color rather than dark, unappealing spots. After frying, strain cooled oil through cheesecloth and store it in a sealed container—you can reuse it 2-3 times for similar applications.
7. Don’t Skip the Resting Period After Frying
Why Resting Enhances Crispiness
Immediately after removing fried chicken from hot oil, place it on a wire cooling rack set over a baking sheet—never directly on paper towels. While paper towels absorb some grease, they trap steam underneath, which softens your carefully crafted crispy coating.
A wire rack allows air circulation around all surfaces, letting steam escape while maintaining structural integrity. Rest chicken for 5-10 minutes before serving. This brief waiting period allows the coating to firm up further and the internal juices to redistribute throughout the meat. The result? Maximum crunchiness on the outside with optimal juiciness inside.
8. Consider the Oven-Finish Technique
Ensuring Perfect Doneness
For exceptionally thick pieces or if you’re worried about raw centers, professional kitchens often use the oven-finish method. Fry your chicken until the coating achieves deep golden color (about 8-10 minutes), then transfer pieces to a 350°F oven to finish cooking through—typically another 10-15 minutes.
This technique guarantees perfect fried chicken every time, especially for beginners. The coating crisps beautifully during frying, while the gentle oven heat completes the cooking without burning the exterior. Use a meat thermometer to confirm internal temperature reaches 165°F. This method is particularly useful when cooking for crowds, as you can fry multiple batches quickly and finish them all simultaneously in the oven.
9. Experiment with Coating Variations
Beyond Traditional Flour
While classic flour coating produces excellent crispy fried chicken, experimenting with coating variations opens new flavor and texture dimensions. Mix cornstarch into your flour at a 1:3 ratio for Asian-style extra crunch. Add finely crushed cornflakes, panko breadcrumbs, or potato starch for unique textures.
Some innovative fried chicken techniques incorporate ground nuts, grated parmesan cheese, or even crushed pretzels into the coating mixture. Spice blends can transform your chicken entirely—try Cajun seasoning, ranch seasoning, or Nashville hot chicken spices. The beauty of mastering basic technique means you can confidently innovate while maintaining that essential crispy exterior.
10. Practice Proper Moisture Control
The Enemy of Crispiness
Moisture is the arch-enemy of crispy coating. Before marinating, thoroughly pat chicken pieces dry with paper towels. After removing from buttermilk or brine, let excess liquid drip off completely. Some chefs even air-dry marinated chicken in the refrigerator for an hour before dredging—the drier the surface, the better the coating adheres.
During dredging, shake off excess flour between coats. Too much flour creates thick, doughy spots that won’t crisp properly. Work with clean, dry hands, or use one hand for wet ingredients and one for dry to prevent coating buildup on your fingers. These moisture management practices ensure every square inch of your homemade fried chicken achieves that desirable shatter-crisp texture.
Conclusion
Mastering crispy fried chicken isn’t about following a single magic trick—it’s about understanding and implementing multiple techniques that work synergistically. From the initial brine to the final resting period, each step contributes to that perfect combination of crunchy exterior and juicy interior that makes fried chicken one of the world’s most beloved comfort foods.
By incorporating these 10 chef-approved secrets into your cooking routine, you’ll consistently produce restaurant-quality golden fried chicken that rivals any professional kitchen. Remember, practice makes perfect. Don’t be discouraged if your first attempts aren’t flawless—even professional chefs refined their technique over countless batches.
The beauty of homemade fried chicken lies not just in the superior flavor and texture you’ll achieve, but in the satisfaction of mastering a culinary skill that brings joy to everyone around your table. So heat up that oil, season that flour, and get ready to create the crispiest fried chicken you’ve ever tasted.
FAQs
Q1: Can I make crispy fried chicken without buttermilk?
Yes, you can substitute buttermilk with regular milk mixed with lemon juice or vinegar (1 tablespoon per cup of milk). Let it sit for 5 minutes before using. Plain yogurt thinned with water or even pickle juice works as alternative marinades that tenderize and flavor chicken effectively.
Q2: How do I reheat fried chicken while maintaining crispiness?
The best method is using an oven or air fryer. Preheat your oven to 375°F, place chicken on a wire rack over a baking sheet, and heat for 10-15 minutes. This allows hot air circulation that re-crisps the coating. Avoid microwaving, which creates steam and results in soggy chicken.
Q3: Why does my fried chicken coating fall off during cooking?
Coating falls off due to insufficient adherence. Ensure chicken is properly dried before coating, don’t skip the double-dredge process, and let coated chicken rest before frying. Also, avoid moving chicken too much during the first few minutes of frying, which disrupts the setting process.
Q4: Can I use an air fryer to make crispy fried chicken?
Yes, though the texture differs slightly from traditional deep-frying. Air fryers produce crispy chicken with significantly less oil. Coat chicken normally, spray lightly with oil, and cook at 380°F for 25-30 minutes, flipping halfway through. Results are healthier with satisfying crunch, though not identical to deep-fried versions.
Q5: How long can I store fried chicken, and does it stay crispy?
Refrigerate fried chicken in an airtight container for up to 3-4 days. It won’t maintain original crispiness when cold, but proper reheating in an oven or air fryer restores much of the texture. For best results, store on a wire rack in the refrigerator to prevent condensation from softening the coating.
Read More: Best 15 Shrimp Spring Rolls Ultimate Fresh Recipe